
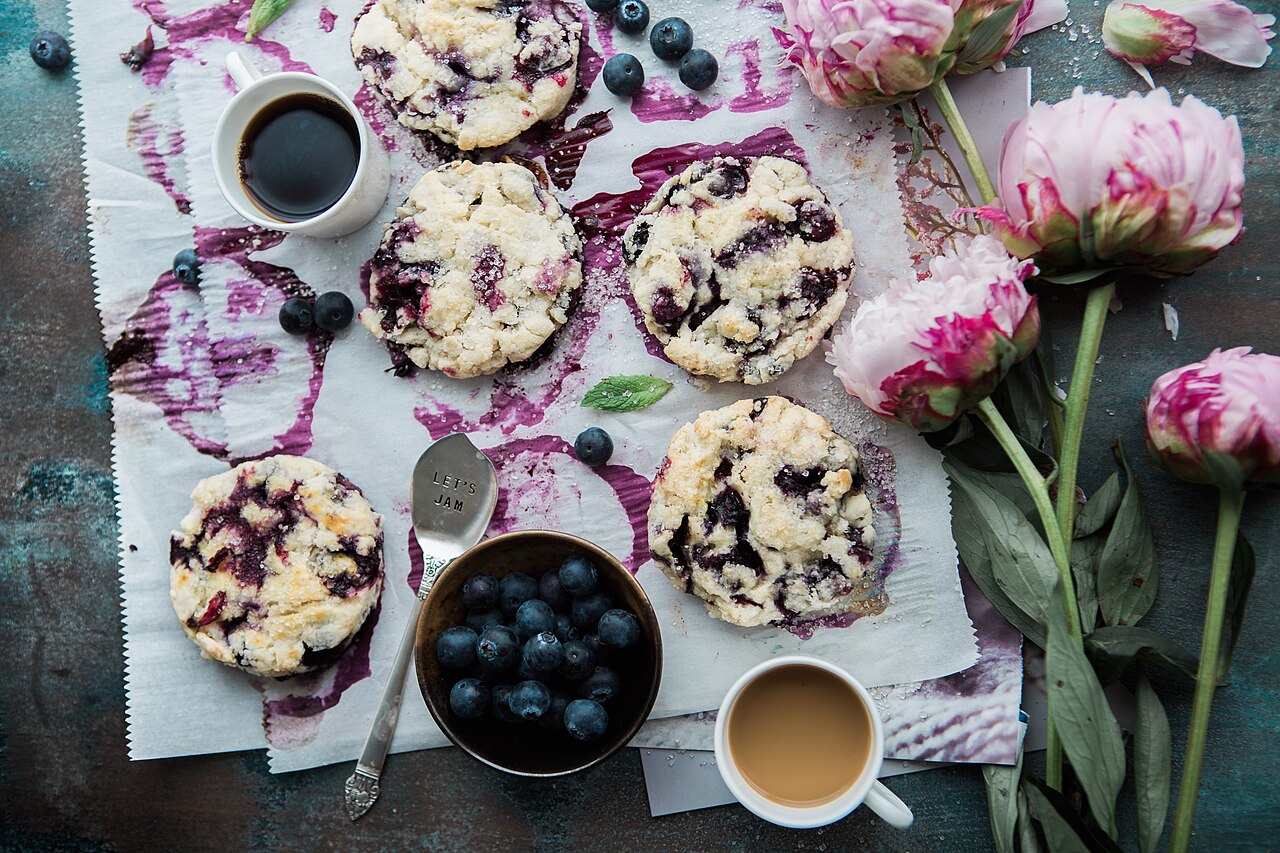
Flat lays are the fastest way to show a product and its details in one frame. Here is how to build a simple overhead setup and keep it consistent, shot after shot.
This guide is general information for creators and businesses in the U.S., not legal advice. Copyright, licensing and drone rules depend on the facts and change over time; check the Copyright Office, the FAA or a lawyer for your situation.
Quick notes
- A flat lay is a photo taken straight down at objects arranged on a flat surface, with the camera sensor parallel to that surface.
- Sidelight from a window, softened with a sheet or thin fabric, gives flat lays more dimension than direct front light.
- Keep the camera perfectly parallel to the surface, usually with a tripod that has a 90-degree arm or an invertible center column.
- Give your main product the most visual weight, use props sparingly, and leave some empty space so the arrangement breathes.
- Lock exposure and white balance and reuse the same surface, light and framing for every product so your catalog looks like one set.
A flat lay is a photograph taken from directly above, with your products arranged on a flat surface and the camera pointing straight down. It is one of the cheapest setups in product photography: one table, one camera position, one lighting arrangement, and no model or mannequin needed. Done well, it shows every detail of a product at once, which is why it shows up everywhere from online shops to social feeds. Done carelessly, it looks flat, cluttered and crooked. The questions below cover how to avoid the second outcome.
What Is a Flat Lay, and When Does It Work Better Than a Straight-On Shot?
A flat lay is a top-down, bird’s-eye photo of objects laid out on a surface, with the camera sensor parallel to that surface. Because everything sits in the same plane, you see the whole scene at once with no perspective distortion. A straight-on shot favors products with a face: a bottle, a boxed item, anything you would photograph from the front. A flat lay favors things read from above: garments, food and ingredients laid out in a recipe story, toolkits, stationery, a collection of items that belong together.
The trade-off is worth knowing before you commit. A flat lay leaves the fit out of the picture. Shoppers can see a folded shirt but not how it drapes on a body, which is why clothing sellers usually pair flat lays with on-model shots rather than replacing them. Flat lays also suit storytelling: what goes in the bag, what comes in the kit, what the morning routine looks like. If your product’s value is its components or its arrangement, the flat lay is your format.
What Background Should I Use?
Your surface is the backdrop, and it will fill most of the frame, so it needs to complement the product without competing with it. Neutral textures are the most versatile: pale concrete, white marble and worn wood all work across a wide range of products. For bright, clean looks such as skincare or stationery, lean toward light surfaces. For moodier subjects such as coffee, chocolate or cocktails, darker surfaces add depth and a brooding feel.
Look hard for distractions before you shoot. Stray lines, shapes or colors in the background pull attention away from the product, and it is far easier to remove them from the scene than from the file afterward. Plain poster board, craft paper, a wooden cutting board or a section of countertop can all serve. Whatever you pick, clean it first: dust and lint that vanish at eye level become obvious from two feet away.
Where Should My Light Come From?
Side light beats front light for flat lays. Direct light straight onto the arrangement tends to look harsh and one-dimensional, while light coming from the side skims across the objects and reveals their shape through highlights and shadows. That shadow is what gives a flat lay its sense of depth, so do not chase a completely shadow-free image unless you want a clinical look.
A large window is the cheapest good source. On cloudy days you get soft, even light near the window, and on bright days you can tape a sheet or thin cloth over the glass to diffuse the sun. Our guide to diffusing harsh light with household items covers that trick in more detail. North-facing windows are prized because the light stays consistent and neutral through the day; south and west windows throw warmer, stronger light with harder shadows. If you use artificial lights, position two soft sources on either side above the setup, and dim or move one back if you want a shadow on just one side. Matte products drink up light, so they need more of it than glossy ones, and glossy items bring their own problem: reflections you may need to manage by changing your angle.
Studio tip: Watch your own shadow. Standing over the setup to arrange or shoot will put a shadow in the frame. Notice where you are relative to the light, and step aside before firing.
How Do I Arrange the Items Without the Shot Looking Cluttered?
Start with one hero product and add props only when they support the story. Give the main product the most visual weight, and place it off-center, near one of the intersecting points of a three-by-three grid, rather than dead center. Use a few props to build diagonal lines that lead the eye toward it: a ribbon, a utensil, a stem, a corner of fabric. Diagonals feel more dynamic than rows of horizontal items.
Then leave room. Negative space, the empty areas of your background, gives the composition somewhere to rest and keeps the frame from turning into a jumble. Cut anything that does not earn its place.
Height matters too. Keep your items roughly the same height. If one prop towers over the rest, your camera can only focus on one plane, and either the tall item or everything around it goes soft. That relationship between focus and distance is worth understanding generally; our explainer on what depth of field is and how to control it breaks it down.
What Angle and Height Should I Shoot From?
The camera must point straight down, with the sensor parallel to the surface. Even a small tilt distorts proportions: a garment leans, a square box becomes a trapezoid. Eyeballing it fails often enough that a small double bubble level that slides into the hot shoe is a cheap fix, letting you check for tilt constantly as you work.
A tripod makes all of this easier and kinder to your back. Look for one with a 90-degree arm that swings the camera out over the arrangement, or one whose center column flips so the camera hangs beneath it. Mind the tripod legs: a leg hanging over the setup casts its own shadow. Our guide to buying a tripod explains what actually matters when choosing one. One wrinkle worth knowing: some photographers shoot a degree or two off perfectly vertical, close enough to read as a flat lay while adding a touch of dimension. If perfectly straight feels stiff, try easing off slightly.
If you shoot a lot of flat lays, tethering the camera to a computer lets you review each frame on a big screen the moment you press the shutter, catching a wrinkled corner or a stray thread before the whole batch inherits the mistake.
How Do I Keep Every Product Photo Looking Consistent?
Consistency is what pulls a product grid together, and it comes from locking everything you can. Set exposure and white balance manually once per session instead of letting auto settings drift between shots, because drifting color is the most common reason a catalog looks mismatched. Shoot from the same height, over the same surface, with the light in the same place, every time.
Prep each product the same way. For clothing, steam the garment first, because creases you would never spot on a hanger take over a top-down frame. Lay it out, smooth it from the center outward with flat hands, square up the shoulders and turn the sleeves a little outward so the garment’s shape is easy to read. Pad shoulders and sleeves with tissue paper if the silhouette needs volume.
Review the first frame at full zoom, checking for dust, wrinkles and tilt, before committing to the batch. Then repeat. Identical framing, light and color treatment across the set matters more than perfection on any single shot.
Can I Do All of This With a Phone?
Yes. A flat lay is forgiving gear-wise because the subject is close, the light is yours to place and the camera only needs to hold one position. Mount any recent phone overhead, keep it parallel to the surface, and tap to lock focus and exposure so they do not shift between shots. A lens with little distortion helps, which is why many flat lay shooters favor normal-length prime lenses on cameras; on a phone, shoot with the main wide lens rather than the ultrawide, which bends edges.
The same rules carry over: one surface, side light, a hero product with breathing room, and identical settings across the set. Our guide to product photos with a phone shows the whole window-and-paper setup, and it pairs well with this one.
For the next step after the shoot, our guide to product photos with a phone covers the wider setup, and our piece on why edited photos come out grainy helps when your overhead shots need a brightness lift in editing.
FAQs
Do I need a special tripod for flat lay photos?
You need a way to hold the camera steady and pointing straight down. A tripod with a 90-degree arm or an invertible center column works, and a small bubble level that fits the hot shoe helps you catch tilt you would otherwise miss.
Can I shoot flat lays with window light only?
Yes. Set up beside a large window and soften the light with a sheet or thin fabric taped over the glass. Side light from the window adds depth; front-on light tends to look flat.
Why do my flat lays look cluttered?
Usually there are too many props competing with the product, or items at very different heights fighting over the focus. Cut back to a few supporting objects that share a color or theme, and leave some of the background empty.
Will a flat lay work as the main product photo on a marketplace?
Many marketplaces accept flat lays for secondary images but set strict specs for the main one, often demanding a plain white background with the product taking up most of the frame. Check each platform’s requirements before a big shoot.